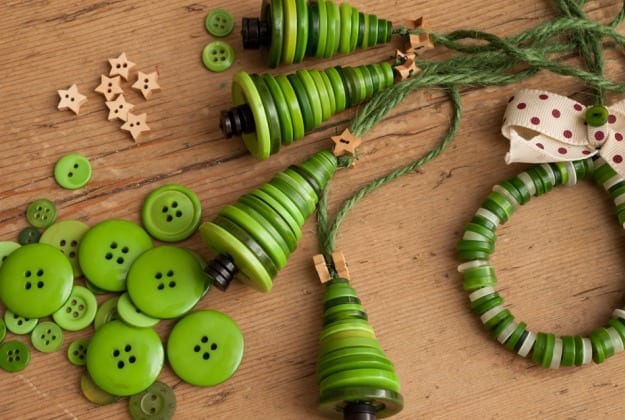
 There’s something really rewarding about making your own Christmas decorations, knowing that you’ve added to the magic and sparkle that shines out from the depths of the darkest winter months.
With buttons at the top of every home-crafters wish list this year, Emily Scarlett Thearle shows us how to combine the two with fun-filled results.
Step 1: Find your buttons! If you’re lucky enough to have inherited a button collection from a parent or grandparent here’s how you can put them to use on your Christmas tree. If not, don’t worry – I got mine from eBay! You will need between 15-20 different sized buttons to make either the snowman or the Christmas tree.
Step 2: Once you have your buttons at the ready, take a piece of wire approximately 30cm long and fold it in half (make sure it’s thin enough to fit through the holes, I used ordinary green plastic coated garden wire available from most garden centres). Thread on the buttons starting from the bottom of the shape you are making.
- For the Christmas tree be sure to start with 2 or 3 small black or brown buttons for the trunk, then add your biggest green button and graduate to the smallest at the top, a star shaped button added to the top adds a lovely detail to this decoration.
- For the snowman the button size pattern should fluctuate up and down to create the round body and head shapes and then be finished off with one large black button to simulate the rim of his hat with a couple of smaller on top.
Step 3: Once you have a shape you are happy with twist off the top of the wire. I used Nutscene Jute Twine, available online in lots of different colours to loop through the wire to make the hanger for the decorations.


